Ever stumble across a blog that has something like this in the sidebar on in a blog post? Would you like one for your blog? It's actually pretty easy.
Before starting, I just wanted to make sure you know that if you want the badge to point to your website, blog, or etsy store, you cannot use your Flickr account. Sure, you could use Flickr to edit the photo and add words or whatever, but you need to upload it to Photobucket.
If you're not too familiar with Photobucket, here's the skinny - it's kinda sorta like Flickr, but with different TOS. Photobucket allows photos hosted there to be used as links to other sites outside of Photobucket. Photos hosted on Flickr have to link back to the original photo on the Flickr site.
1. Upload a picture to Photobucket.
2. When the picture is uploaded, click to edit the photo and resize it to either 125x125 or 150x150. Save.
3. Open another tab or window and go to your blog. Start a new post. If you have a private blog for testing things, use that one. (If you don't have a private blog for messing around and testing things, I recommend starting one. But more on that later.)
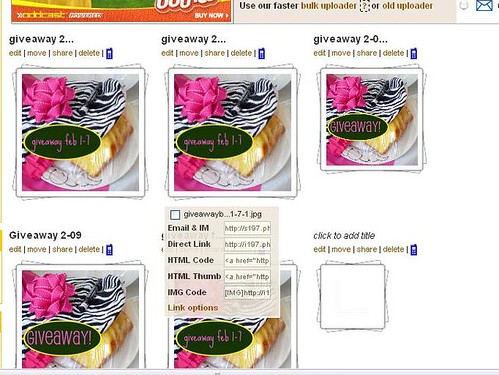
4. Go back to Photobucket and hover your mouse over the picture and you'll see a menu appear under the picture. Click the code where it says HTML Code. It should automatically copy for you.

(Yes, I realize how ironic it is that this picture is hosted with Flickr. I prefer blogging from Flickr. Actually, I just really really like Flickr.)
5. Go back to your blog and paste Photobucket HTML Code that you just copied. It should look something like this:
<a href="http://www.pamhawk.com" target="_blank"><img src="http://i197.photobucket.com/albums/aa39/PassItOnPlates/giveawaybadgefeb1-7-1.jpg" border="0" alt="Example Badge"></a>
6. Change URL to point to you. This is the yellow highlighted text in the example above. I have changed it to my own URL.
7. Change alt to your blog or website title. This is the turquoise highlighted text in the example above.
8. Below this, add the following code.
<textarea name="textarea" cols="30" rows="5" wrap="VIRTUAL">
9. Below this, copy and paste another copy of the photobucket code that you edited above.
10. Below that, copy the following code./textarea
<a href="http://www.pamhawk.com" target="_blank"><img src="http://i197.photobucket.com/albums/aa39/PassItOnPlates/giveawaybadgefeb1-7-1.jpg" border="0" alt="Example Badge"></a>
<textarea name="textarea" cols="40" rows="4" wrap="VIRTUAL">
<a href="http://www.pamhawk.com" target="_blank"><img src="http://i197.photobucket.com/albums/aa39/PassItOnPlates/giveawaybadgefeb1-7-1.jpg" border="0" alt="Example Badge"></a>
</textarea>
It's ok to leave the line breaks in there. In fact, if you take out the line breaks, your text box will appear next to the badge instead of under it.
Here's the code with the line breaks:
Here's the code with no line breaks:
Now test it.
If this blog post is in a private blog you use for testing, just publish it.
If you opened a blog post in your regular blog, click on Post Options (above the orange Publish Post button) and back date it (to maybe a month ago) before publishing it. This way you can test it without interfering with your current blog posts and subscribed readers.
Open a new tab or window and open the same blog where you are currently working. Open another new post.
Navigate to the published post and click on the code in the box. Paste the code into the new blog post. Publish (or back date and publish.)
Look at the published new post. It should be just your badge without the text box.
Good? Yay! Delete this second blog post (with the badge only) and go to the first blog post where you created this. Save it as a draft for future needs. Copy the code and paste it wherever you want.
Not good? Examine the steps above and see if something was overlooked. You may have to "read" the HTML word by word to see if something's missing or incorrect.
...One last request? Post your blog URL here in a comment so we can all admire your handiwork.

Did you like this post? How about subscribing in a reader
or by Email?
(And remember, all comments are do-follow, so your comment left here supports YOU.)


I just wanted to point out that you are wrong about flickr.. Mine is hosted by flickr, but my buttons still bring everyone to my blog.
ReplyDeleteOtherwise, you have a nice tutorial here :)
Hi Lilly,
ReplyDeleteThanks for the compliment on the tutorial. I'm glad I was able to help.
I do want to point out that Flickr's TOS clearly points out that all pictures have to link back to their FLickr page.
The following text was copied directly from this flickr page: http://www.flickr.com/guidelines.gne
"Don’t use your account to host web graphics like logos and banners.
Your account will be terminated if we find you using it to host graphic elements of web page designs, icons, smilies, buddy icons, forum avatars, badges, and other non-photographic elements on external web sites."
Everyone, please don't let your account be deleted due to violating their TOS. You'll lose everything you have uploaded there.
I'm sooo stuck on this one,have followed the instructions step by step but I still cant get mine to work?
ReplyDeletehttp://www.mynooshka.blogspot.com
My button is on my blog but it's not working?
Any ideas?
Thanks
that's amazing! I just followed ur instruction and made mine :D thanks a lot!
ReplyDelete