Sunday, August 31, 2008

Three column blogger template

Many things we learn are out of necessity, not because we have a wish list of things we want to learn, just in case we later find a use for the knowledge. Ok, changing a car tire and first aid are exceptions to this, but many business and online activities are learned on the fly and when the need arises. This is how I learned the basics of HTML, but I am by no means an expert.

For a long time I had been wanting to change the Plate Diaries blog from two to three columns. The layout and organization is a mess and it's a hard blog to read. I finally sat down one day and poked around the internet, looking for a template to try. If you want to look around, your Google search terms for this could be:
blogger template three column

If you are interested in changing your blog template, first copy and paste all the HTML from your existing blog into Notepad (it's a no-frills word processing program on your PC.) Do not use Word because it will change the format and mess up your HTML. Save the document.

Next, open each widget you have on your blog sidebar and copy the HTML into another Notepad document. These may go bye-bye when you change your template and I know you don't want to risk losing all that stuff. Save this document, too.

Third step, while strongly suggested, is not required: start a new blog. Keep it private and out of the search engines, and use it just to mess around with the code and experiment. I've had one for months and every now and then I test something there before putting it on a public blog. This has been a lifesaver for me.

Next, find a template you want to use. I tried several beautiful templates from various "free blogger templates" blogs and got Blogger errors with each one I tried. Giving up on that, I reverted the test blog's template back to Blogger's Minima Stretch, then implemented the code found at this site:
http://tips-for-new-bloggers.blogspot.com/

The easiest way to find the locations mentioned in this tutorial are:
1. Open the above link in a new tab or window.
2. Open your blog's HTML page in a new tab or window.
3. Go back to the site with the code you will copy and hit Ctrl+F to open a search dialog box. Type in a little of the code you are to look for when inserting some new code.
4. Navigate back to your blog's HTML and search.

After spending all morning dinking around, looking for a template that works, and is the right width, there is only one thing I can say:

Perfect.


Tuesday, August 26, 2008

Finding HTML Colors

Have you ever tried changing the look of your blog or website and wanted to use a very specific color? No matter what program you use, be it a website or blog development software, Blogger or some other blog platform, there is usually a set collection of colors available and that's it.

This was the case when I made a recent tweak to this blog. I was frustrated with my "Thisaway Rose" template loading slowly on my cable connection and knew something had to change.

The little light bulb cam on in my head over my morning coffee today as I realized I should just switch to the "Minima Stretch" template and just change the background color. Duh. Don't know why I didn't think of that before...

So I make the switch and click the pink button to change the background. I wanted the blog to look pretty much the same as before, and when talking to Donna, my Pass It On Plates partner in Wisconsin, I like referring to this blog as "The Pink Blog" and the Plate Diaries as "The White Blog." We have one other blog that we use, just between ourselves, that we call "Projects." It's marked 'private' and we chat back and forth there and post articles, business links that we use, and it's a great place to collaborate. Our "Projects" blog is the subject of another post, though.

Back to colors.The Blogger color choices were way too dark and I don't really understand the Hex Code used. I tried fiddling with the numbers and letters but nothing seemed to change. Enter a Google search on "Hex code." The site December.com was at the top of the list so I checked it out.

Wowie. If you have ever searched for hex codes, this is the place to go.
Mind you, these are only the named cool-pinks. There are other hues, other saturations, and a whole section of un-named colors. I did try some un-named colors and Blogger didn't recognize them, but with thousands of hex codes at my disposal, I was able to find exactly what I was looking for.

.

.

Friday, August 22, 2008

Connecting with your readers

A couple of weeks ago I was surfing through my Technorati Experiment post to check out some of the blogs in the list and ask to have my links added to their list. I left a comment at one of the blogs and promptly forgot about it until later when I checked my email.
Here is what it said:

Hey Pam Hawk,

Just wanted to thank you for stopping by http://Bradblogging.com on August 3rd, 2008.

Your comment definitely helps me write better articles, and allows other readers to see your opinion about the article (http://bradblogging.com/more-traffic/give-and-go-technorati-authority-increase-anyone/) that you talked about.

I hope to see you back again soon! If you have a busy schedule, you could always subscribe to my R.S.S feed so that my posts are available at your convenience. Simply click this link: http://feeds.feedburner.com/bradblogging or go to the main home page and click the corresponding button.

Cheers!
Brad @ Bradblogging.com


Now while I realize Brad has probably set up an auto responder to send this email the second I left his site, it left a positive impression on me, and I did go back to read more posts.

You know what? I found some valuable information on his blog and have since subscribed.

If the email hadn't been sent to me, I probably would never have returned to his blog. Instead, this tiny effort on his part gained him another regular reader. Pretty darned smart, if you ask me.

When people leave comments for me, I read them all and try to respond accordingly. I also visit the sites of my commenters and read their posts and try to leave relevant comments as well.

Connecting with your readers encourages a sense of community in your blog. It also makes you more human and it does increase your readership, whether it's through regular visits or RSS subscribers. In fact, if you enjoy reading my blog, I invite you to subscribe, as well. Just click one of these buttons in the sidebar and select your reader.

So tell me, what do you do to connect with your readers?
.

.

Wednesday, August 20, 2008

Six steps to designing a Project Wonderful ad

Now that you have some info on buying and selling advertising with Project Wonderful, what ad will you use to advertise your site or hot new product? Today I'll show you how to make a great-looking Project Wonderful ad without any special computer programs.

You can create one in just 6 easy steps using your Flickr account.

1. Look at Project Wonderful and decide what ad size you want to make. This quick tutorial is for the 125x125 square ad.

2. Log into your Flickr account and choose an image. Click on it.
(I made an ad based on the image used for the giveaway blog post so they matched.)


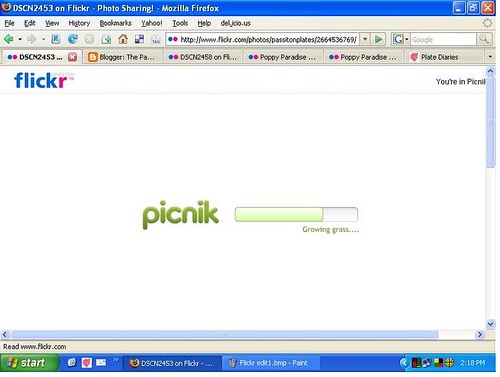
2. Click Edit. Flickr's editing program, Picnik, will open. Be patient, it takes a moment. When it opens, you will see two tabs. One is Edit and the other is Create. You will start out in the Edit tab.


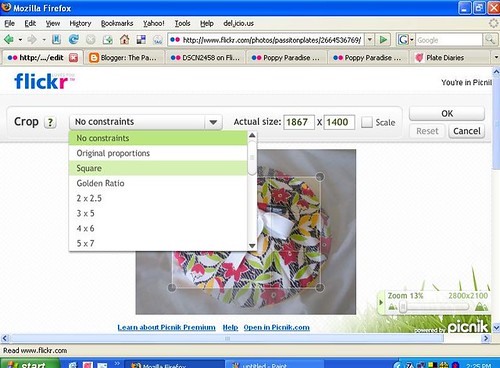
3. Crop your photo. If you are making a square ad, select the square from the drop down box. (These screenshots are from an upcoming blog post... You'll just have to bookmark this blog or subscribe so you don't miss my next Flickr tutorial.)


4. Resize your photo to the Project Wonderful ad size you want to make. In my case, I typed in 125 and Picnik did the rest. When the shape and size are to your liking, click OK.

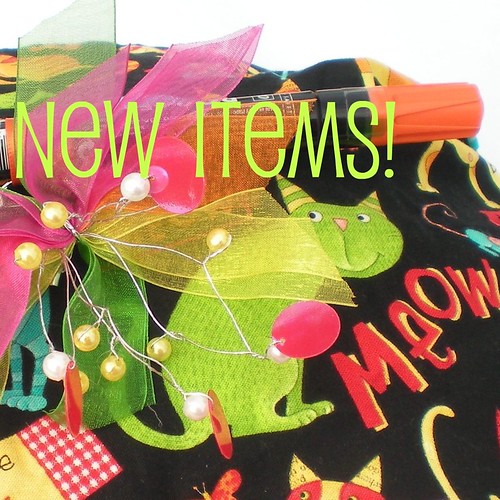
5. Now for the fun part. Click the tab named Create. Type in your advertising word or words and play with the color, font, layout, and other settings until it's perfect.

..........

6. Save your work. Before you complete the save process, let Picnik know if you want to save a new copy or replace the original. I recommend always saving a new copy so you can use the original for other ads or projects. Save this image to a location on your computer so you can easily upload it to Project Wonderful.

Ta dah! Quick and easy.
And fantastic-looking.

If/when you make one, comment here with a link to your ad. I'd love to see how it turned out. Plus, if you send me a link to your ad, I'll write up a post to be published next week to show off all the ads. Hey, that's free advertising for you.

Ok, also... Come back tomorrow to find out who won the big giveaway!

Tuesday, August 19, 2008

Making money with Project Wonderful

Today we'll go over how you can use Project Wonderful to make a little moolah.

Like I said in an earlier post, you probably won't be able to quit your day job, but at the very least,
You should earn enough to fund your own Project Wonderful advertising efforts.

In order to make a little money with Project Wonderful, you'll first need to set up some ad space on your blog. If you have been following these posts for the past few days, you know these ad spaces are called Ad Boxes. It may take a little time (a day or two at most) to get your blog approved initially, since the PW staff needs to make sure your blog is valid and meets their criteria. (They don't like spam blogs or other bogus sites.) Once approved, you can set up your ad boxes based on your preferred size and location of the box on your site.

One last note, I have two ad boxes on this blog; one at the top and another in the sidebar. It took some experimentation to figure out that the best ad box size for this particular blog was to have one header ad at the top and one large skyscraper ad on the side. When I offer more ad boxes, I end up with fewer bids and the price drops. As my traffic grows, it may be worthwhile to increase the amount of ad space, but supply and demand has shown me that for now, two large ads work the best for me. What baffles me about this is that my personal blog, The Adventures of Pam & Frank, has very little traffic, maybe an average of 4 hits per day, but the ad box prices are generally higher there than they are here. My only guess is that different content from one site to another can also affect pricing. Oh. And for the record, I'm not saying the content over there is better than over here. It's just different.

Some things I recommend doing, especially if you're starting out are:

1. Be prepared to fiddle with your ad box over the next week or so until you find what size and placement work best for you. Keep in mind that the price your ad box demands is based completely on supply and demand. The more ad boxes you have available, the lower the bids will be. If you have a lot of traffic and only a few ad boxes, the price will go up as advertisers try to outbid each other for the coveted space on your site.

2. Regardless of how you set your preferences for approving ads, you will need to check your ad boxes every day for at least a few weeks. Why?
  • If you set your ad boxes to auto-approve every ad, you will get a lot of bids and ads in your boxes right away, but you will need to check and make sure the the type of ads shown in your ad box(s) are of a nature that you want showing on your site.
    My ad boxes were set up this way and despite designating them to be "Safe for Children" I was still getting adult-oriented ads showing graphic renditions of T&A (ummm, that's breasts and bottoms.) I immediately put up a notice on my profile explaining that ads not save for children would be canceled and the bidders would be banned from placing future bids on my ad boxes. Then I did just that. I still occasionally ban bidders for not following these rules.

  • If you set your ad boxes to approve every bid by hand, plan to check bids at least once a day to approve ads for your site. If you wait too long between checking bids, you run the risk of having no ads in your ad boxes, advertisers will retract their bids, or their funds could be depleted from other bids they have placed before the bid on your ad box is approved.

3. When you see an ad you like on your site, consider adding that advertiser as a buddy so at some point if you decide to only auto-approve ads from your buddies, their ads will continue to be approved for your site.

4. When you see an ad you like on your site, or if you have been earning steady payments on your site from a regular advertiser, go to your PW Admin page and click on their avatar. What you'll want to do next takes just a minute but can create a long term benefit:

Send them a message thanking them for advertising on your site and inviting them to continue bidding.

If you have any events coming up where you know your traffic will increase significantly, you may want to let them know ahead of time. Since a traffic increase can increase your ad price, your regular advertisers may appreciate knowing that their ad could be outbid and might want to adjust their bid accordingly to make sure that your extra traffic sees their ad.

This is a great way to develop a relationship with your advertisers and could pay off to your advantage in other ways.

Does your advertiser have a blog?

Do you think they may modify their bid to make sure they outbid any competition that comes along when your traffic goes up?
They may want to.

Do you think they may blog about your message, giving them a chance to get in on your extra traffic?
Possibly.

Knowing that you are keeping them in mind when conducting your business, do you think they would be more likely to continue advertising on your site?
Very likely.

What other kinds of things have you done or seen people do with their ad boxes or for their advertisers?

Next:
A quick and easy way to make PW ads (like the giveway one shown above)
Don't want to miss a post? Click the subscribe button on the sidebar today!

Monday, August 18, 2008

Advertising on Project Wonderful

Continuing from last Friday's post, let's talk about how to advertise your blog or online store through Project Wonderful (aka PW.) There are two ways to find the ad boxes that you want to bid on.

One way to find ad boxes to bid on is to surf other blogs and look for PW ad boxes. If they have one or more with a link inviting you to advertise on that site, just click that link to get to their bidding page. From there you can see their traffic stats and ad pricing over the last month, maybe learn a little about that site and their policies regarding advertising they allow on their site, and a link to see all their other ad boxes.

The other way is to go to the PW website and do a search based on your preferred ad box size, how much traffic the site gets, where the traffic comes from, etc. There are a lot of online comix sites, but you can tailor your search by keyword, so if you want to advertise on sites within a specific topic you can search for that. Just like any internet search, if you use general keywords you will have a long list of ad boxes to browse through, and if you use more specific keywords you will see ad boxes that are more in line with your desired niche. From there, you can sort your results based on the ad box price, amount of traffic, alphabetically, etc.

You may find it handy to use both techniques to find ad boxes.

Some things I recommend doing, especially if you're starting out are:

1. Bid $0 or $.01 on as many boxes as you can, even if the current bid is a few cents. When the higher priced bids expire, your ad will be shown in the space until the bidding price goes up again. It's a great way to take advantage of supply and demand pricing and get your ad seen on boxes you may otherwise not have budgeted for.

2. Set up an advertising campaign. You set the parameters, such as the level of traffic to the site, what country a certain % of traffic comes from, keywords used to describe the sites, price range of the ad boxes, etc. This will get your ads to a broad range of sites automatically and you don't have to babysit your ad to keep placing it here and there. This is quite simple to do, as PW walks you through the entire process. It's all point and click.

3. Send a message to the ad box owners where you are having success. Thank them for the opportunity to advertise on their site, point out what you like about their site, and let them know how you have benefited from their ad box. If you have ad boxes on your site, invite them to check it out and consider placing a bid on your ad boxes. It's kind of an "I'll scratch your back if you scratch mine" approach, but joint efforts in advertising is almost always a win-win. If this first step develops into a nice conversation, you could blog about it and let them know about the blog post. They, in turn, may mention your blog post, driving more (free) traffic to your site.

4. Do you have a special sale or event going on? Make up an ad specifically to draw people to that event. Set up a campaign to have PW automatically bid on sites that compliment your event, and schedule your ad campaign to end just before your event ends. An example is the giveaway I have going on through August 20. I set up a campaign with the ad shown below. The ad linked to my blog post and the ads will disappear about 15 minutes before the giveaway ends.


Remember, the key to great advertising is patience and consistency. Once you place your ads, give it a few days, weeks, or maybe even a few months to really see how your efforts are paying off.

Coming up next:
Setting up ad boxes on your sites (or, making money with PW)
A quick and easy way to make PW ads (like the giveway one shown above)

Don't want to miss a post? Click the subscribe button on the sidebar today!
.

.

My August PW campaign


PW-8-08.JPG, originally uploaded by passitonplates.

I set up an ad campaign on PW specifically for the giveaway that runs through August 20. When setting up a campaign, I tell PW what kind of bids I want to make and it automatically does the work for me.

In this campaign, I specified that PW should look for adboxes that:

  • Support square ads
  • Support text and graphical ads
  • Have at least 1 page views today
  • Have on average at least 20 unique users over the past 5 days
  • Have at least 80% of their hits from United States over the past 5 days.
  • Describe itself using these tags: women, cooking, baking, cookies, craft, handmade

As you can see, I've had a few thousand views and a couple dozen hits, which gives me a nice CPC (cost per click).

I have two other ads that I'm bidding on by hand (same ad, same goal) on the website Corporette and Lipstick to Crayons. You can see how lower traffic and lower click rate affects my cost per click.

So why on earth am I bidding so much more on Lipstick than Corporette? I checked out their websites and see my target demographic there and I figured it would be worth the higher bid price to get my ad in front of their readers.

I hope that helps!

Oh - one more tip. You can click on each website with an ad box to find out their traffic stats. I feel like my figurative slip is showing by telling you this, because I wish my stats were a lot higher, but it's important for you to know how to see what kind of traffic a site has before you commit to placing a paid ad on their site.

(I guess I'm happy that my stats are not consistantly zero day after day!)

Tuesday, August 5, 2008

Interview with Laurie Beth Beggin

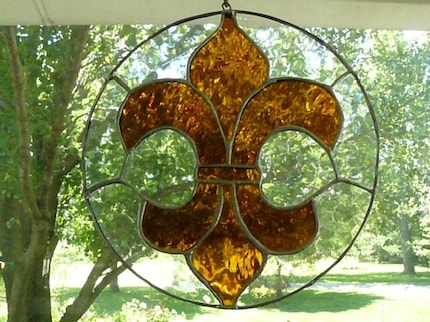
Dear readers, today we have another interview with my good friend and very talented stained glass artist Laurie B. I have mentioned her and linked to her several times here and now is your chance to find out more about her promotion techniques. If you're not familiar with Laurie B, please visit her Etsy shop to see her work. She is skilled in the Tiffany style of creating stained glass and her pieces range in style from flowers, craftsman, mosaic, abstract, and a collection of custom-made angels. Have you seen her Harry Potter? Wow.

Do you blog for the sake of blogging or do you blog to promote another activity? If you blog to promote another activity, please tell us a little bit about it.

My primary reason for blogging is to promote my store on Etsy, 27lauriebethbeggin.etsy.com. I do REALLY enjoy it though. I enjoy photography and as I go through my day I'm always thinking about topics to blog about, and picture to share on my blog.

Of all the blogging tools, blogging communities, blogging techniques, and widgets and gadgets, what do you think has made the biggest impact for you?

I'm still so new to blogging that this is a tough one to answer. I recently joined Interior Design Team and they seem incredibly organized. I'm really trying to dig my heels into that group. At this point I'd say Marmalade Pink has been the most supportive and helpful. Amy has great articles and she's so willing to share her knowledge.

What is Marmalade Pink and how does it help you?

Marmalade Pink is an online community for networking of artists all around the globe. It is a community on the Ning network that you join. It has a place for blogging, photo sharing and the main page has wonderful articles, a list of members who you can befriend and a spot for advertising.

How much time do you spend at Marmalade Pink?

I spend at least a 1/2 hour every day surfing Marmalade Pink to see who is new, what the articles have to say, read the marketing articles, new posts, etc.

What kind of results have you had?

I think with all marketing and networking it takes time to see the results. I've made a direct sale from this group but I think more importantly I've made consistant, wonderful friends. Since I'm so new I think it's going to be six months to a year before I see results from all of my hard work. I just keep connecting and trusting that it will bring results down the road.

Regarding your Etsy shop, what technique has been the most successful in generating sales?

I relist at least one item once or twice a week on Esty.

How do you relist an item on Etsy?

To relist an item you simply go to your expiration dates, click on the item you want to relist, and click renew. You're then charged the listing fee to relist the item. You don't have to wait for it to expire to relist it...

How much time do you spend doing this?

Oh, probably 10 minutes a week at most.

Has it increased overall sales for you?

I think this has helped my sales, but only slightly.

What one piece of advice would you like to tell other bloggers or Etsians who want to increase their traffic and/or sales?

Blog EVERY day, share interesting stories about yourself, your art, your life and SUPPORT OTHER ARTISTS! Commenting on THEIR life, their art and their blog is very important.
United we stand!
With gratitude, Laurie Beggin http://lauriebethbeggin.blogspot.com

And so, Dear Readers, please look for Laurie B on these various networks and visit her Etsy shop to see other breathtaking stained glass work that she has done. Is there one listed that you can't live without? Please visit her blog, as well. Like I've said in an earlier post here, visiting her blog is sure to inspire, inform, and entertain you - if you haven't been over there, please take a look. If you also have an Etsy shop please do check out Marmalade Pink and consider how becoming a member can help you promote your own shop.
.