If you missed the earlier post, you can check it out here: http://www.pamhawk.com/2009/02/flickr-blog-header-generator.html
I am currently building a website for my high school. The school closed in 1990 when the school district dissolved (very sad for all of us) and now we have an all school reunion being planned for next year. I'm using this technique to create a header for the website, but you can use this technique to a header for your Etsy shop, your blog, a website, or wherever.
This is soooo easy.
1. Find a picture you want to use.
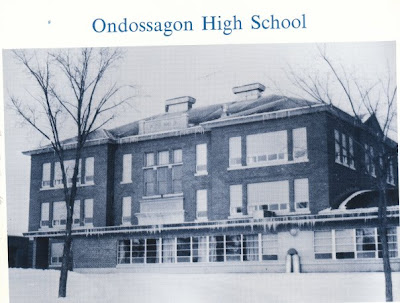
In this example, I'm using a photo scanned from an old yearbook.

2. Run your picture through the blog header generator (There's a link in the sidebar, too.)
After trying it with Center, Upper Left, and Lower Right, I decided on Center. Here's the blog header that was generated. Save it to your computer.
Why not just crop and edit in flickr or another program? I could, but this crops it to ideal dimensions and scales the picture to the correct width. It's just easier and faster this way.
I am currently building a website for my high school. The school closed in 1990 when the school district dissolved (very sad for all of us) and now we have an all school reunion being planned for next year. I'm using this technique to create a header for the website, but you can use this technique to a header for your Etsy shop, your blog, a website, or wherever.
This is soooo easy.
1. Find a picture you want to use.
In this example, I'm using a photo scanned from an old yearbook.

2. Run your picture through the blog header generator (There's a link in the sidebar, too.)
After trying it with Center, Upper Left, and Lower Right, I decided on Center. Here's the blog header that was generated. Save it to your computer.
Why not just crop and edit in flickr or another program? I could, but this crops it to ideal dimensions and scales the picture to the correct width. It's just easier and faster this way.

3. Upload the picture you just saved to your flickr account.
Click Edit, then click the tab that says Create.
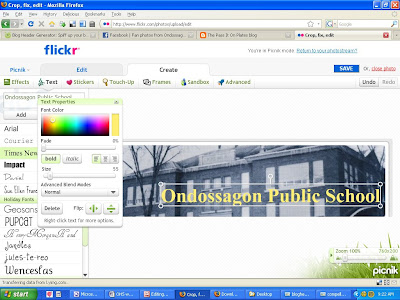
Now click Text to add your title. Adjust the color, size, font, and placement until it's perfect.
In this case, I used the name of the school, since that's also the name of the website. You could use your blog name, your Etsy shop name, and if you're using this header for a special sale or special event you can customize your text to promote this event.

Ta dah! Finished product. You can see that after adding text, I also clicked Frames and added rounded corners.

If you want to see this in action, you can take a peek at the school website at www.ondossagonaggies.com
Meanwhile, if you try this, please comment here with your links so we can all visit your shop and see your handiwork!
Did you like this post? How about subscribing in a reader or by Email?
Thank you so much for the help!
ReplyDeleteWow, this was awesome! Thanks for the help and the link, it will definately help me make a new header for both my Etsy shops. Much obliged! (hope you had a good reunion, I didn't go to mine) :D
ReplyDelete